DJI Mic 3 on Mac: control it from your computer
Plug the receiver into your Mac over USB-C and its settings are on screen. No phone. No DJI Mimo. Three steps and you're done.
Version 1.5.0 for Macs with Apple Silicon (M1 or later). Signed and notarized by Apple.
What you need
- A Mac with Apple Silicon (M1 or later). There’s no Intel build yet; on an Intel Mac you can build the app from the source code.
- A DJI Mic 3 receiver, which is what Mic Control is tested with (firmware 03.01.00.10, two transmitters). The Mic Mini family also works, with fewer settings: see DJI Mic Mini on your computer.
- The USB-C cable that came with the mic. Some cables only charge, and with those the Mac sees nothing.
Install it
With the installer. Open the .dmg and drag DJI Mic Control to Applications. Since version 1.4.0 the app is signed with an Apple Developer ID and notarized by Apple, so it opens like any other app: the first time, macOS asks whether you want to open an app downloaded from the internet, and you click Open.
With Homebrew. If you already use it, one command installs it, and brew upgrade --cask mic-control updates it later:
brew install --cask qubik89/tap/mic-controlFirst connection
- Plug the receiver into the Mac with the USB-C cable, with the receiver switched on.
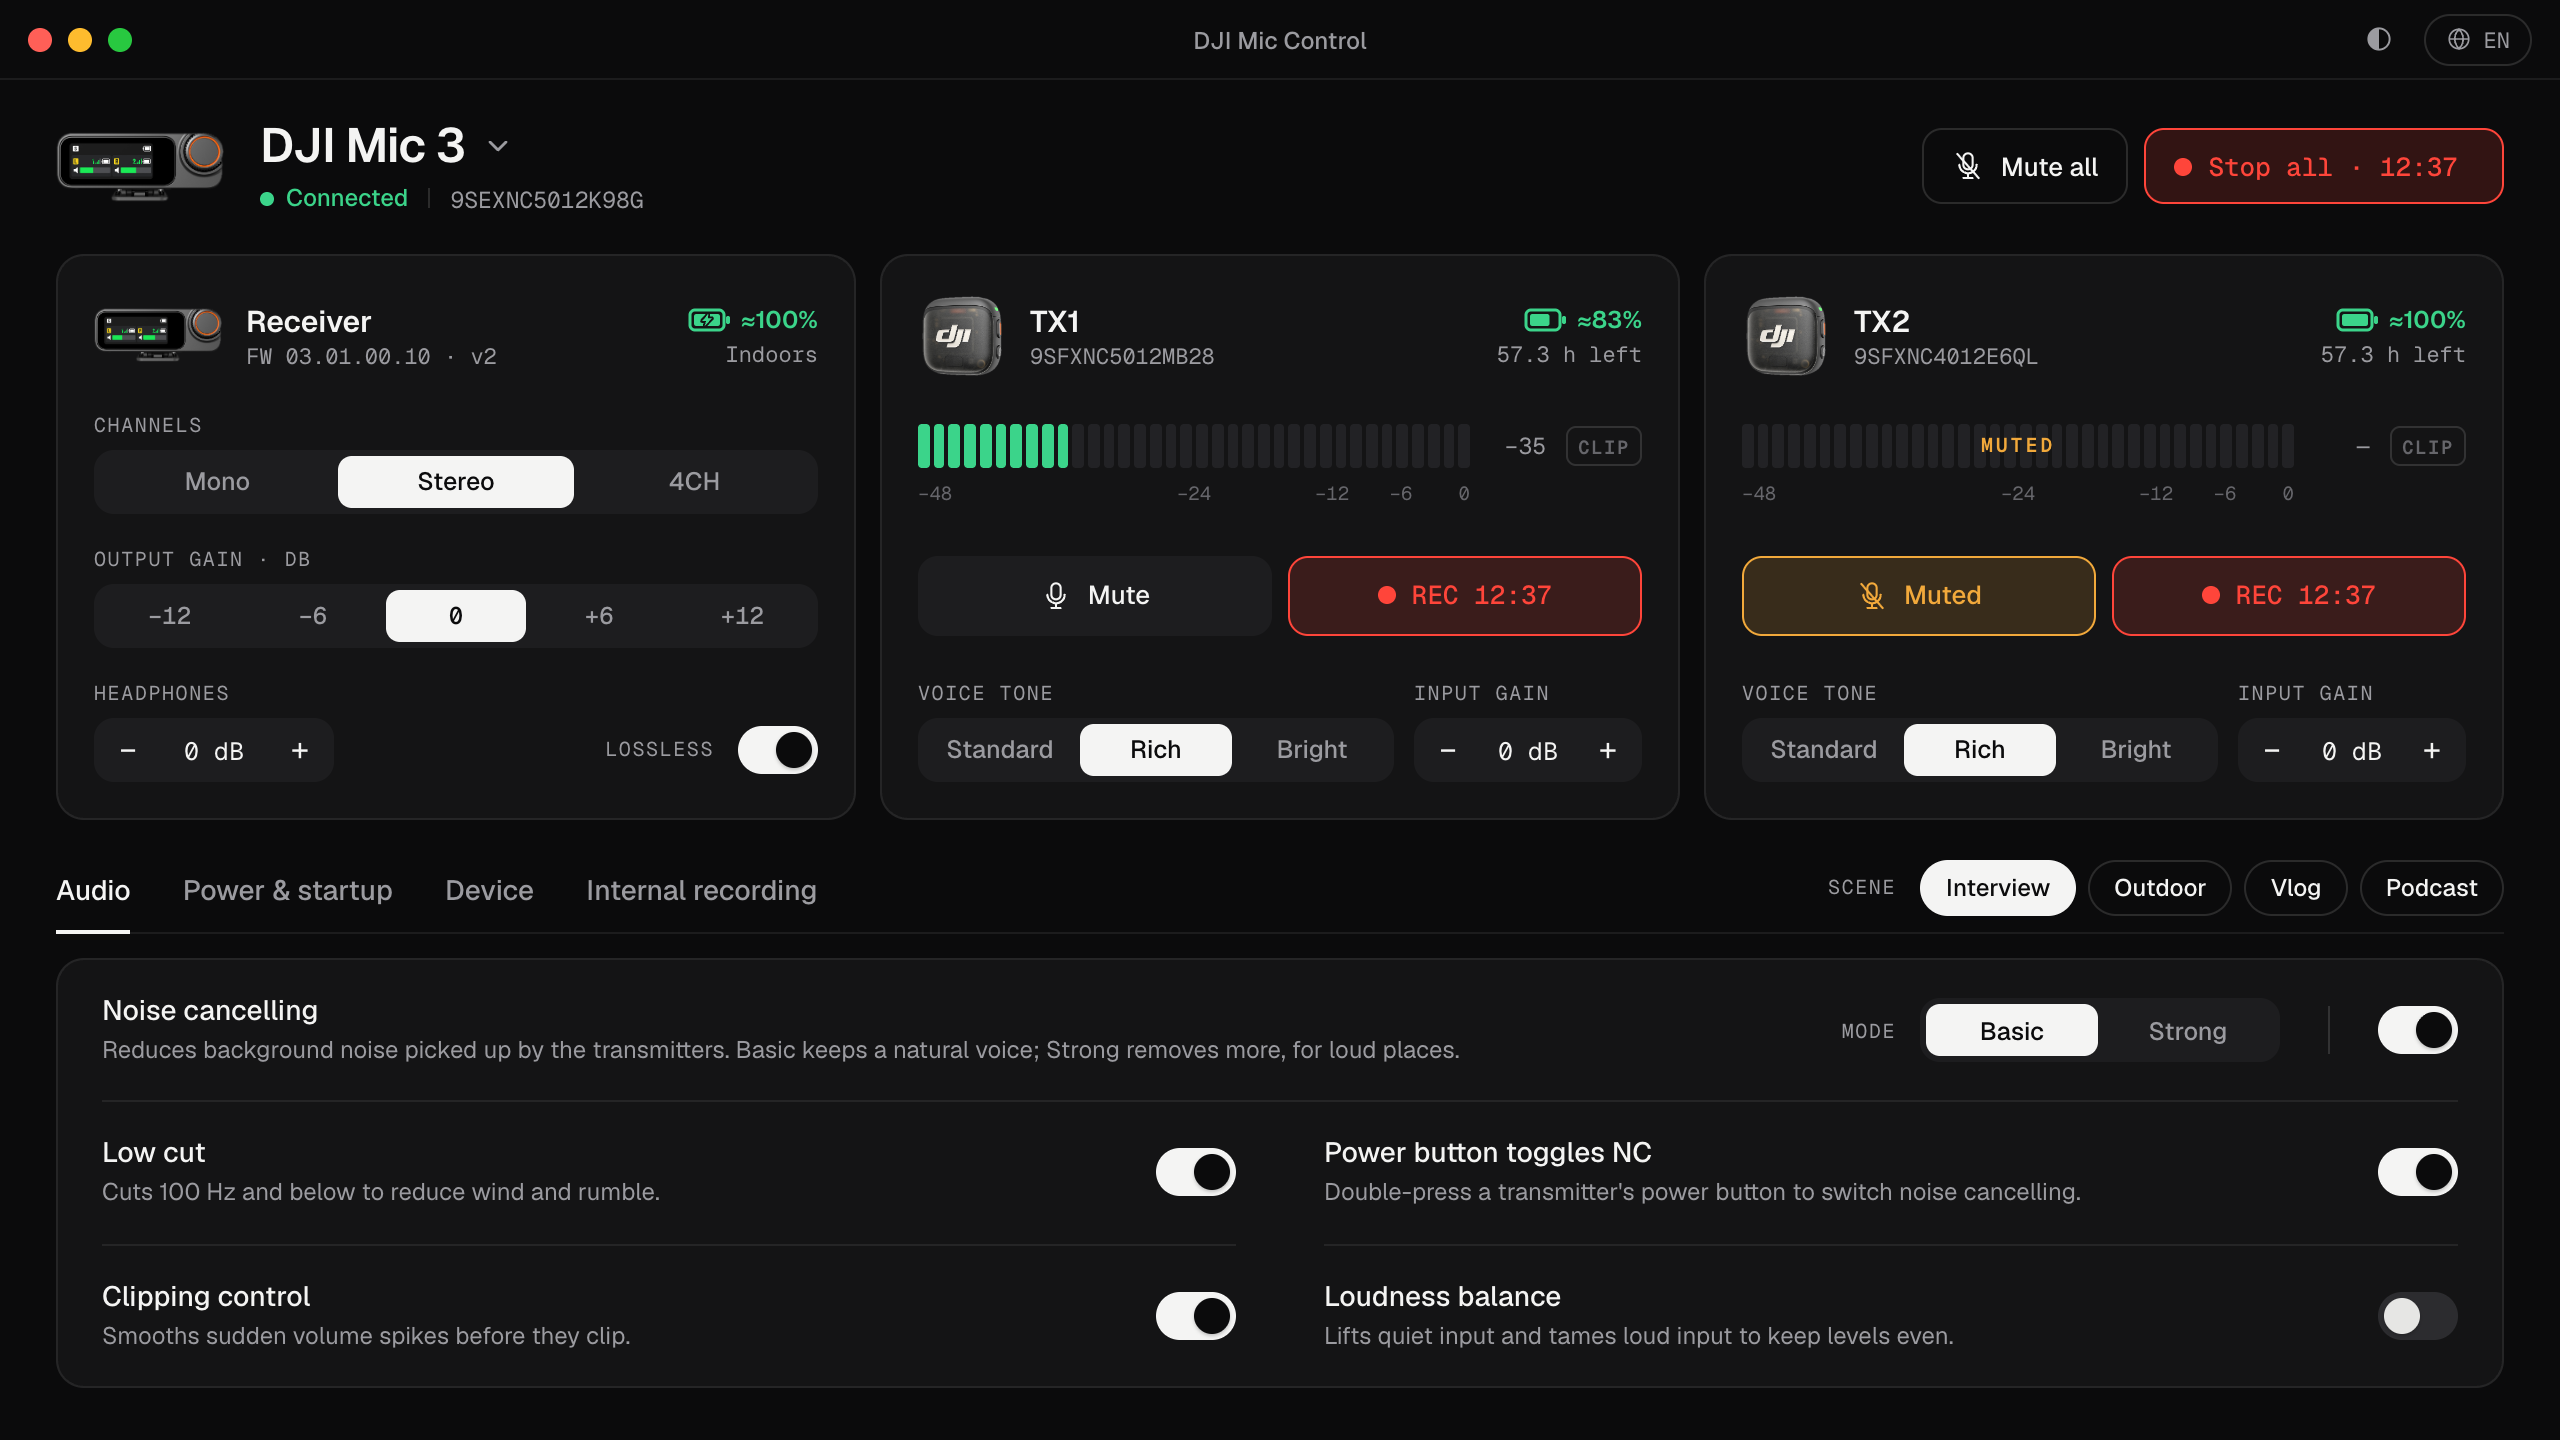
- Open DJI Mic Control. It finds the receiver on its own and shows a card for the receiver and one for each linked transmitter, with live levels.
- To record, choose the receiver as the microphone in the app you record with. It appears as Wireless Microphone RX, the name DJI gives it, in System Settings → Sound → Input and in each app’s microphone menu. There’s a full walkthrough in how to connect the DJI Mic 3 to a computer.
The audio and the settings travel over separate USB interfaces: you can record in any app while you change settings in Mic Control, and it doesn’t touch the sound.
What you can do from the Mac
- See levels for each transmitter, with a clip warning that stays lit for a moment so you don’t miss it.
- Change the gain: input gain per transmitter and the receiver’s output gain. If it sounds quiet, see setting the gain.
- Noise cancelling, low cut, voice tone, lossless audio and the rest of the settings, each explained in one line. They’re all described in every DJI Mic 3 setting.
- Scenes: Interview, Outdoor, Vlog and Podcast change several settings in one click.
- Mute or record on every transmitter at once, and see the battery and the internal recording time left on each one.
The menu bar
Mic Control also lives in the menu bar. From there you can turn the transmitters’ LEDs and noise cancelling on or off without opening the window, and the icon warns you when a transmitter’s battery is running low. If you close the window, the app stays in the menu bar; you can also have it start at login, hidden.
Updating
- Installer: download the new
.dmgfrom this site and replace the app in Applications. The app doesn’t check for updates by itself: it has no network code at all. - Homebrew:
brew upgrade --cask mic-control.
If something doesn’t work
- The Mac doesn’t see the receiver: it’s almost always the cable, a hub or the receiver being off. Go through DJI Mic 3 not recognized on Mac.
- macOS says the app is damaged: that only happened with version 1.3.0 and earlier, which weren’t signed. Download the latest version.
- Something else: report it on GitHub, with your macOS version and your receiver’s firmware.
Uninstalling
Drag DJI Mic Control from Applications to the Trash, or run brew uninstall --cask mic-control if you installed it with Homebrew. The mic’s settings stay on the mic: Mic Control doesn’t keep a copy on the Mac, only its own theme, language and last tab.
The short version: three steps
- 01
Download and install
Open the .dmg and drag DJI Mic Control to Applications.
- 02
Open it the first time
It's signed and notarized by Apple. The first time, macOS asks whether you want to open an app downloaded from the internet: click “Open”.
- 03
Plug in the receiver
Connect the receiver with a USB-C cable and open the app. It finds it on its own.
Using Homebrew? One command
It does the same as step 1. To update it later: brew upgrade --cask mic-control.
brew install --cask qubik89/tap/mic-controlWhat you'll be able to do
- See each transmitter's levels live, with a clip warning.
- Change input gain, output gain and headphone volume.
- Turn on noise cancelling, low cut and clipping control.
- Mute or record on every transmitter in one click.
- Apply scenes: Interview, Outdoor, Vlog and Podcast.
- See battery and recording time left.
FAQ
Does it work on Intel Macs?
For now there's only an Apple Silicon installer. On an Intel Mac you can build it from source.
Does macOS say the app is damaged?
That happened up to version 1.3.0, which wasn't signed. Since 1.4.0 it's signed and notarized by Apple and opens without that warning. If you have an older version, download the latest.
Can I record audio on the Mac at the same time?
Yes. The receiver's USB audio and its settings are separate: record in your app while you change settings. More in how to connect it.