DJI Mic 3 settings explained, one by one
The receiver has a tiny screen and DJI Mimo spreads the options across sub-menus. Here's every setting on one page: what it does, what it costs and what we'd pick.
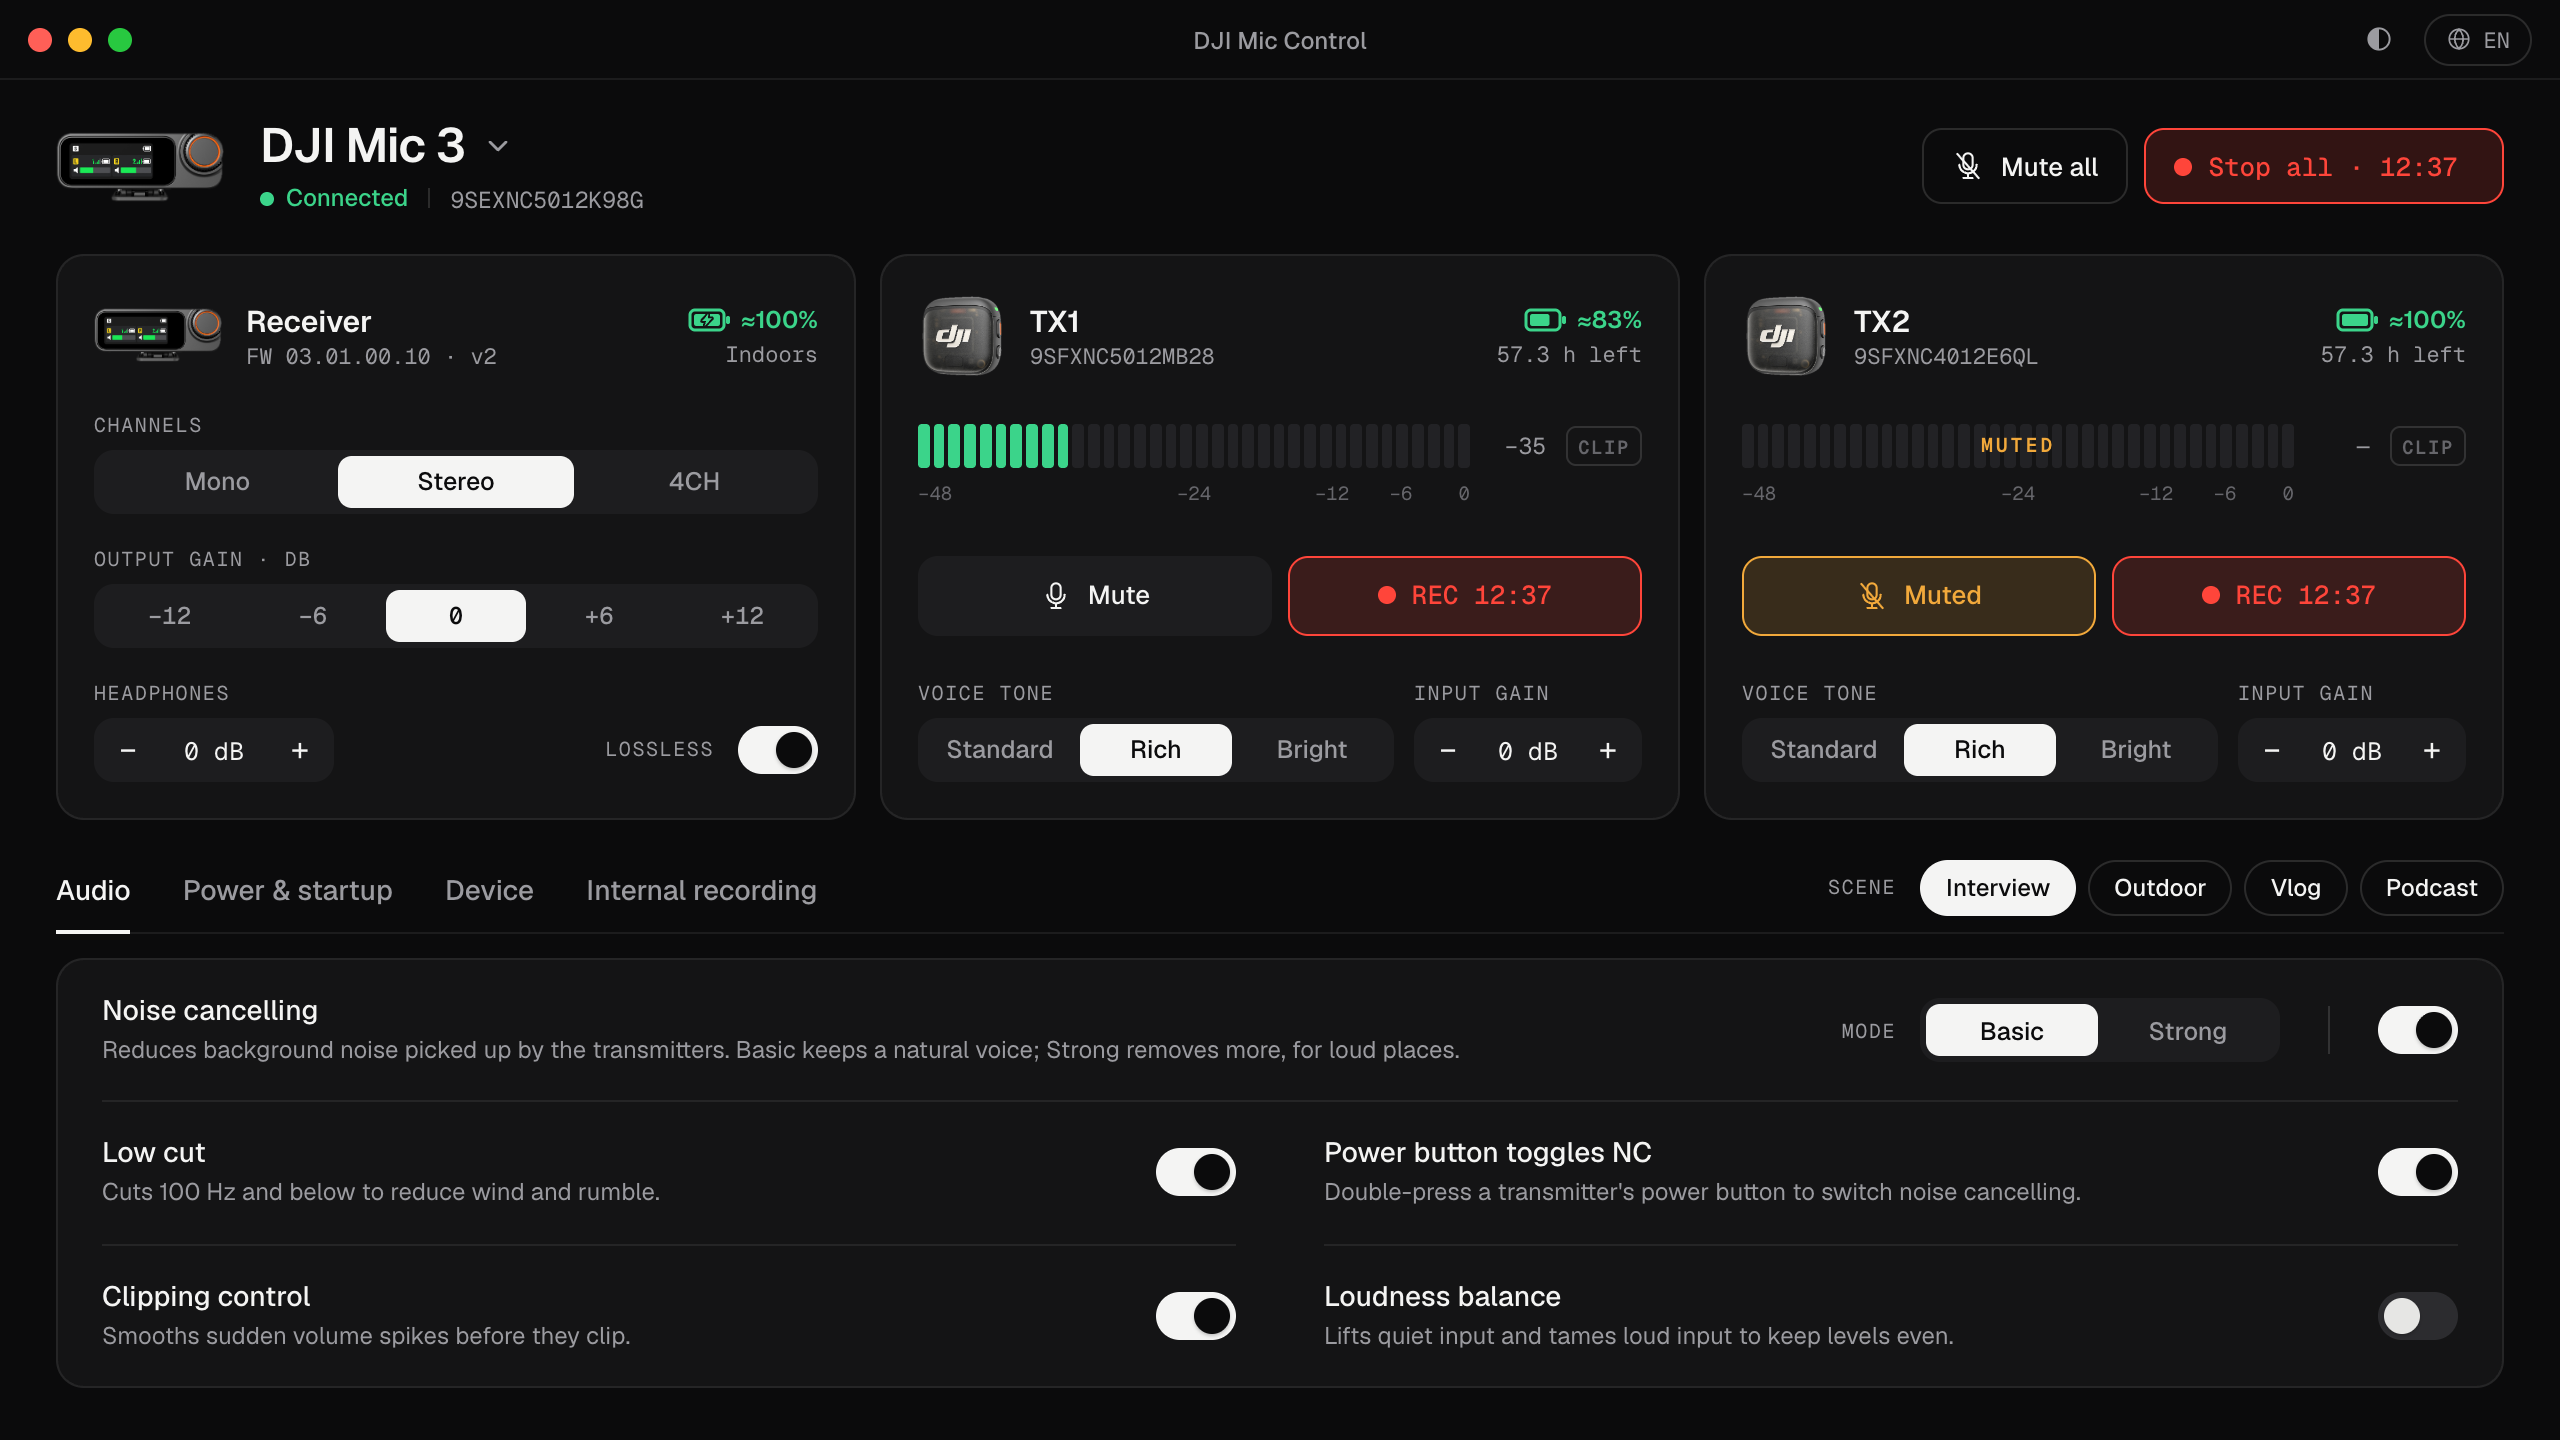
Every setting at a glance
| Setting | What it does | Our pick for voice |
|---|---|---|
| Noise cancelling | Reduces background noise. On/off, plus a Basic or Strong level | On, Basic. Strong only in loud places |
| Low cut | Cuts the lowest frequencies: rumble, wind, handling noise | On |
| Voice tone | Regular, Rich (fuller lows) or Bright (extra clarity), per transmitter | Regular |
| Lossless | Sends uncompressed 48 kHz / 24-bit audio from transmitter to receiver | On at a desk, off when you need range |
| Clipping control | DJI’s “Automatic” adaptive gain: smooths spikes | For loud, unpredictable places |
| Loudness balance | DJI’s “Dynamic” adaptive gain: evens out quiet and loud input | Off if you set the gain by hand |
| Channels | Mono, Stereo or 4CH | Mono for calls, Stereo for two people |
| Output gain | Receiver level, −12 to +12 dB in 6 dB steps | 0 dB to start |
| Input gain | Each transmitter, −12 to +12 dB in 1 dB steps | Set it with the meter |
| Headphones | Monitoring level on the receiver | Whatever is comfortable |
| 32-bit float | Internal recording with far more headroom | On for important takes |
| Loop recording | Overwrites the oldest files when storage is full | On if you record all day |
| Auto power-off | Receiver and transmitters switch off after 15 minutes unused | On |
Below, each one explained. You can also change all of them from the computer with Mic Control, except where noted.
Audio
Noise cancelling
It reduces the background noise the transmitters pick up: fans, air conditioning, traffic. It has two parts: turning it on and choosing the level, Basic or Strong. Basic keeps a more natural voice; Strong removes more and is meant for loud places. There’s a whole guide on it: Basic or Strong.
A related option, Power button toggles NC, lets you switch noise cancelling with a double press of the transmitter’s power button.
Low cut
It cuts the lowest frequencies, where you find wind, handling noise and the hum of traffic or air conditioning. DJI’s specs give the frequency response as 100 Hz–20 kHz with low cut on and 20 Hz–20 kHz with it off. For speech it’s almost always worth having on.
Voice tone
Three presets, set per transmitter. DJI describes them as Regular (natural and balanced), Rich (fuller lows) and Bright (extra clarity). In Mic Control, Regular is called Standard. Rich suits thin voices; Bright helps when a voice sounds muffled, for example under clothing.
Lossless
The transmitters send uncompressed 48 kHz / 24-bit audio to the receiver. The price, according to DJI: roughly half the range (400 m becomes 200 m) and about two hours less transmitter battery. At a desk, where range doesn’t matter, it’s worth turning on.
Adaptive gain control: clipping control and loudness balance
The Mic 3 can manage the gain by itself, in two modes:
- Automatic (in Mic Control, Clipping control): smooths sudden swings in volume and suppresses spikes. For sport, events, anywhere unpredictable.
- Dynamic (in Mic Control, Loudness balance): raises quiet input and lowers loud input. For quiet indoor places.
While it’s on, DJI says gain can’t be adjusted on the receiver. If you’d rather control the level yourself, leave both off and read how to set the gain.
Receiver
Channels: mono, stereo or 4CH
Mono mixes every transmitter into both channels. Stereo puts TX1 on the left and TX2 on the right. 4CH gives each of up to four transmitters its own channel, if your software supports it. Switching to or from 4CH reconnects the receiver’s USB audio. If only one voice is heard in a call, this is why: see mono, stereo or 4CH.
Output gain, input gain and headphones
Output gain (receiver) and input gain (each transmitter) decide how loud the signal is; headphone level only changes what you hear. The details, and the order to set them in, are in the gain guide.
Plug-free speaker
With the receiver connected to a phone, it lets the phone keep playing sound through its own speaker instead of going silent. Changing it restarts the receiver.
Internal recording
Each Mic 3 transmitter can record internally, as a backup or with no receiver at all.
- 32-bit float: much more headroom, so a shout doesn’t ruin the take. According to DJI, recording time drops from 57.3 h to 43.0 h (single file). More in 32-bit float.
- Loop recording: splits the recording into segments and overwrites the oldest files when storage is full.
- Record on power-on: transmitters start recording as soon as they’re switched on.
- Low-battery auto record: transmitters start recording when the receiver, or the camera or phone it’s connected to, runs low on battery.
- Record via TX button: the transmitter’s power button starts and stops its internal recording.
According to DJI, the transmitters can keep an Original file, with the raw audio, and an Edited file, with noise cancelling, low cut and voice tone applied.
Power
- Auto-off (receiver): the receiver switches off if no transmitter links to it within 15 minutes.
- Auto-off (transmitters): a transmitter that isn’t connected or recording switches off after 15 minutes.
- Follow camera power: the receiver turns on and off with the camera when it’s connected by the 3.5 mm cable or the camera adapter.
Device
- Mic LEDs: turns the transmitters’ status lights on or off. Handy on camera.
- Vibration: the transmitters vibrate to confirm actions such as starting a recording.
- Indoor / outdoor environment: shown in Mic Control, but changed on the receiver.
What the Mic 3 doesn’t have
- Safety Track: the backup copy 6 dB quieter that the Mic Mini records on the second channel. On the Mic 3, the equivalent is 32-bit float internal recording.
- Mic Control doesn’t update firmware, format the transmitters’ storage or handle timecode: for those, use DJI Mimo or the receiver.
Mic Control’s scenes
A scene changes several settings at once and only sends what’s different:
| Scene | Noise cancelling | Low cut | Channels | Voice tone | Also |
|---|---|---|---|---|---|
| Interview | On, Basic | On | Stereo | Rich | Clipping control on |
| Outdoor | On, Strong | On | Mono | Bright | Clipping control and loudness balance on |
| Vlog | On, Basic | On | Mono | Standard | Loudness balance on |
| Podcast | Off | Off | Stereo | Rich | Lossless, 32-bit float and clipping control on |
See and change them all from your computer
- 01
Plug in the receiver and open Mic Control
Every setting sits in a tab, with a one-line explanation under it.
- 02
Start from a scene
Interview, Outdoor, Vlog or Podcast change several settings at once. Then fine-tune.
- 03
Watch the meters while you change things
You see the effect of each setting before the real take.
What you'll be able to do
- Every setting in tabs, each explained in one line.
- Four scenes that change several settings at once.
- Live levels for each transmitter while you adjust.
FAQ
Does this page replace DJI's manual?
No, it complements it. DJI's manual is the reference; this page explains each setting in plain words, checked against DJI's FAQ and specifications.
Where are the settings stored?
On the mic itself: the receiver and the transmitters. Mic Control changes them there and doesn't keep a copy on the computer.
What's a good starting point for voice?
Noise cancelling on Basic, low cut on, Regular voice tone, adaptive gain off, Mono for calls or Stereo for two people. Then set the gain with the meter.
Can Mic Control change everything DJI Mimo can?
Almost every audio and recording setting. Not timecode, formatting the transmitters' storage or firmware updates: for those, use DJI Mimo.