How to connect the DJI Mic 3 to a computer
Over USB-C, the receiver becomes an ordinary USB microphone on Mac, Windows and Linux. No driver and no app needed. Here's how, and what to check when it doesn't show up.
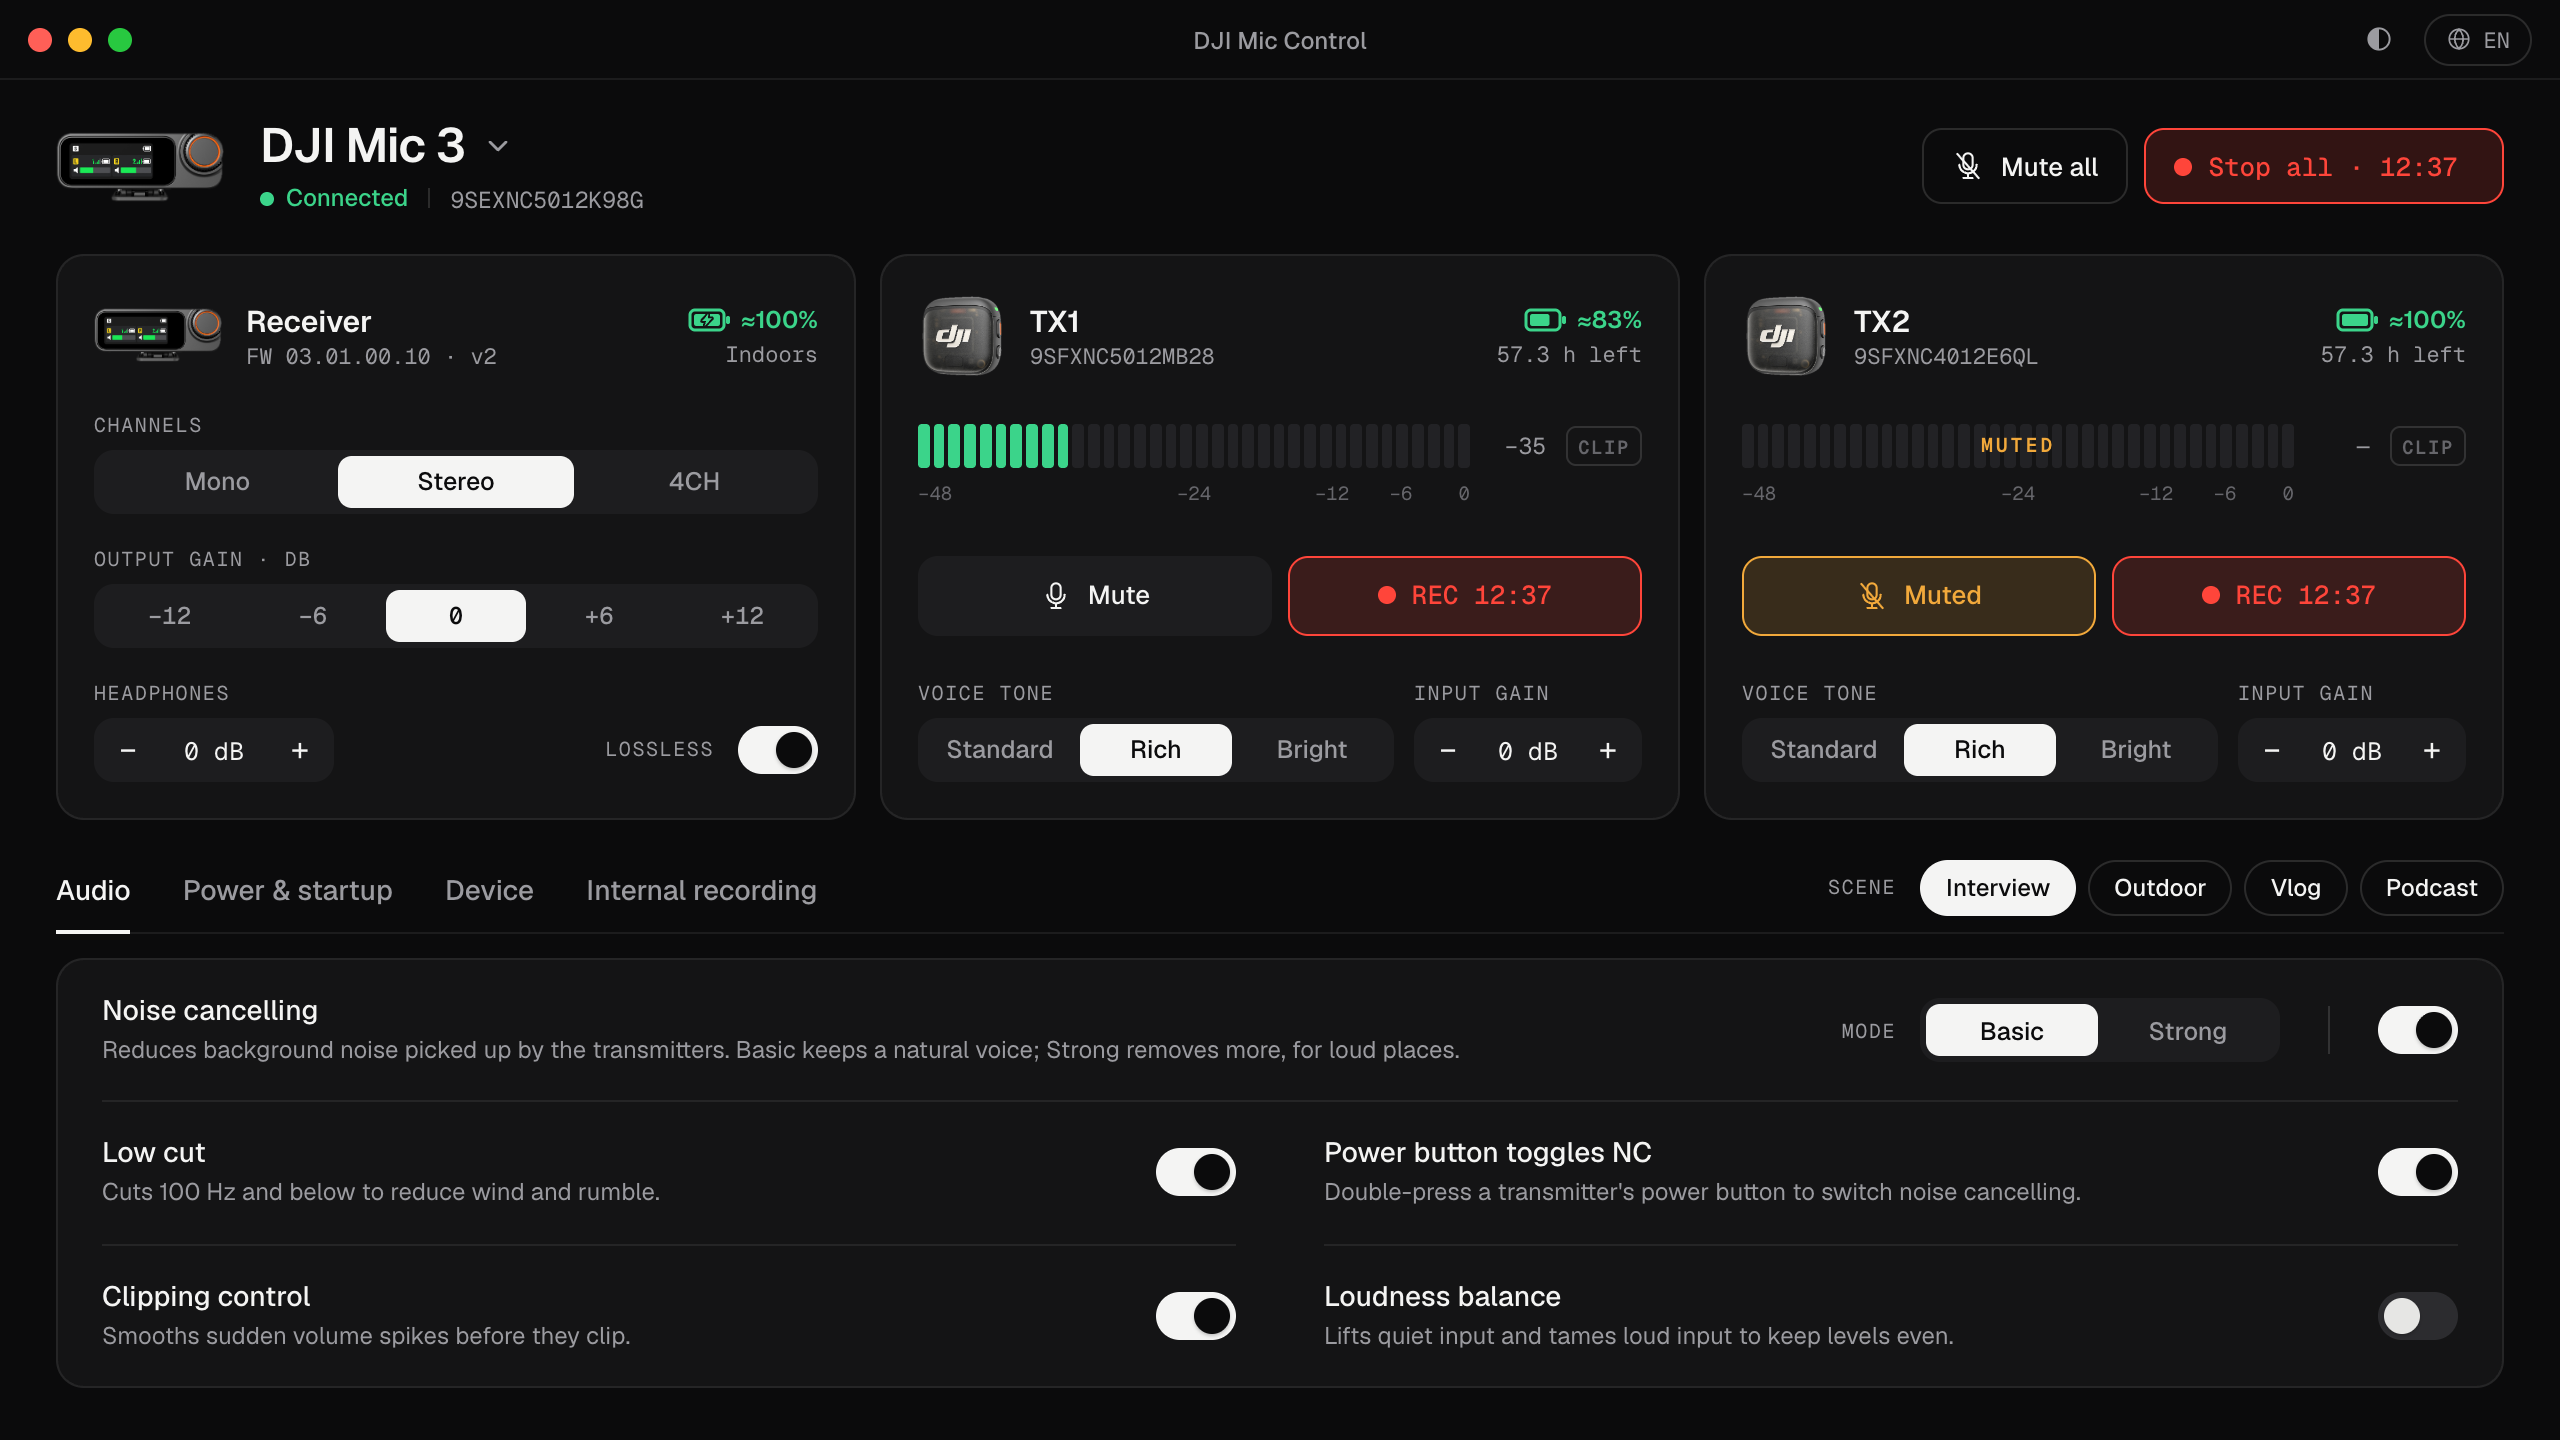
What you need
- The receiver (RX) and at least one transmitter (TX), linked to each other.
- A USB-C cable that carries data. The one in the box does. Some cheap cables only charge, and with those the computer sees nothing at all.
- A USB-C port, or a USB-A port with an adapter. While you’re testing, plug straight into the computer: some hubs, docks and monitor ports don’t get along with USB audio devices.
Step 1: plug the receiver into the computer
Plug the cable into the receiver’s USB-C port and the other end into the computer, with the receiver switched on. Within a few seconds the computer adds a new audio input. There’s nothing to install: the receiver is a standard USB audio device, so macOS, Windows and Linux use their own built-in driver.
Step 2: choose “Wireless Microphone RX” as the input
Wireless Microphone RX is the name DJI gives the receiver’s audio input. Select it as the microphone:
- macOS: System Settings → Sound → Input. Pick Wireless Microphone RX and talk: the input level should move.
- Windows: Settings → System → Sound, under Input. Pick Wireless Microphone RX as the device for speaking or recording.
- Linux: your desktop’s sound settings (GNOME Settings → Sound, or Audio in KDE). It shows up like any other USB microphone.
Step 3: choose it inside your app as well
This is the step most people miss. Zoom, Teams, Google Meet, Discord, OBS and most editors keep their own microphone setting, and many stay on the built-in mic even after you change the system input:
- Zoom: Settings → Audio → Microphone.
- Google Meet: the gear icon → Audio → Microphone.
- Teams, Discord and others: look for Microphone or Input in the app’s audio or device settings.
- OBS: add an Audio Input Capture source and pick the receiver as the device. There’s a full walkthrough in the OBS guide.
If the call app has an option to adjust the microphone volume automatically, consider turning it off: it can fight with the gain you set on the mic. More on that in setting the gain.
Mono or stereo for calls?
With two transmitters, the receiver can send them mixed (Mono) or split, TX1 on the left and TX2 on the right (Stereo). Call apps usually use a single channel, so in Stereo one of the two voices disappears. For calls and streams, use Mono. For recording two people on separate tracks, use Stereo. All the details are in mono, stereo or 4CH.
Not showing up? Check in this order
- The cable. Swap it for the one in the box. A charge-only cable is the most common cause.
- The port. Plug straight into the computer, without a hub, dock or adapter.
- The receiver. Is it on, and does its screen show the transmitters linked?
- 4CH mode. When you switch to or from 4CH, the receiver changes its USB identity and the audio input disconnects and reconnects. Wait a few seconds and pick the input again in your app.
- Auto power-off. If it’s enabled, the receiver switches itself off after 15 minutes without a transmitter signal.
- Does the computer see the device at all? On a Mac, hold Option, open the Apple menu → System Information → USB. On Windows, open Device Manager → Audio inputs and outputs. If the receiver isn’t listed there, it’s the cable, the port or power, not a setting.
On a Mac there’s a dedicated checklist: DJI Mic 3 not recognized on Mac.
And with a 3.5 mm cable?
DJI also lists an analog route: a 3.5 mm audio cable from the receiver into the computer’s microphone input. If the computer only has one combo headset jack, you need a 3.5 mm splitter. It works, but the sound then depends on the computer’s own input, and the computer can’t talk to the receiver: no levels, no settings. USB-C is simpler and gives you more.
Mic Mini and Mobile Receiver
They work the same way: over USB they’re USB microphones too. On the DJI Mic Series Mobile Receiver, noise cancelling is set with the switch on the receiver itself.
Control the mic from the computer
Once the receiver is a USB microphone, Mic Control adds what the system doesn’t show you: a live level for each transmitter, input and output gain, noise cancelling, channel mode, internal recording and battery. It runs alongside your recording app, because audio and settings travel over separate USB interfaces. The Mac version is tested with a DJI Mic 3; the Windows and Linux builds are previews.
And to control it from the computer
- 01
Plug in the receiver
Use the cable that came with the mic and plug it straight into the computer.
- 02
Pick it as the input
In the system's sound settings and in the app you record with, choose “Wireless Microphone RX”.
- 03
What you'll be able to do
- See each transmitter's level live, so you know the computer is getting sound.
- Switch between mono, stereo and 4CH without touching the receiver.
- Change gain and noise cancelling while you record.
FAQ
Do I need a driver for the DJI Mic 3?
Not for audio. The receiver is a standard USB audio device and macOS, Windows and Linux use their built-in driver. Only Mic Control's control channel needs WinUSB on Windows, set once with Zadig.
Why does Zoom still use my laptop's microphone?
Zoom, Teams and Meet keep their own microphone setting. Choose “Wireless Microphone RX” inside the app too, not only in the system settings.
Why can I only hear one of my two mics?
The receiver is probably in Stereo: TX1 goes left, TX2 goes right, and many call apps only use one channel. Switch to Mono. More in mono, stereo or 4CH.
Does it work the same with the Mic Mini?
Yes. The Mic Mini receiver is a USB microphone too. In Mic Control it has fewer settings: see DJI Mic Mini on your computer.
Can I record on the computer and change settings at the same time?
Yes. Audio and settings travel over separate USB interfaces, so your recording app and Mic Control don't get in each other's way.